
How to Remove and Clean Your Carburetor [7 Steps]
Having carburetor problems?
If you have a vehicle or a piece of power equipment that’s struggling to start, you’re probably sweating and wondering if you’ll need to take it in to a mechanic. Fortunately for you, it’s possible that the problem is simply a clogged carburetor that needs a good cleaning, which you can do yourself with some time and effort. Check out the instructions below to learn how to remove and clean your carburetor.
Note that in situations like these, it’s a good idea to check your owner’s manual for advice and recommendations. Be sure to comply with the information you find there, as it’s likely that it will be better calibrated to your specific vehicle or equipment.
Also note that there are many variations of carburetors for many kinds of equipment: go-karts, golf carts, lawnmowers, pressure washers, and more. This makes it difficult to create blanket instructions that apply absolutely everywhere. These steps are meant as guidelines, and you may have to make some adaptations for your carburetor type.
SUPPLIES
To complete this project, you’ll want to gather the following:
- Phillips head screwdriver
- Flat screwdriver
- Needle nose pliers
- Wire brush
- Wrench or socket set
- Carb cleaner
- Compressed air
- Chemical dip (optional)
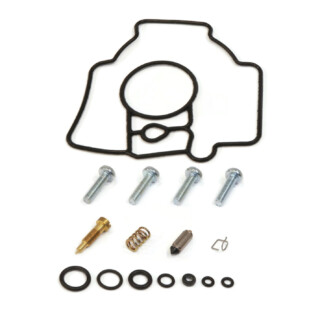
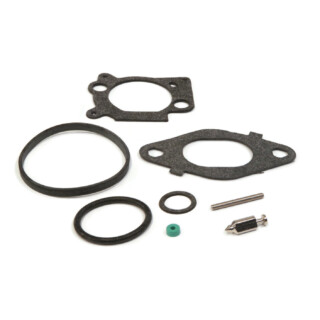
- Gasket set or carb rebuild kit (optional but recommended)
- Gloves
- Safety glasses
- Thin wire
- Old toothbrush
SAFETY
Be safe while you’re completing this project. This means taking steps like wearing the recommended protective equipment and working in a well-ventilated area since you'll be working with various chemicals. 2
Saving time and money by DIYing is great, but it shouldn’t be done at the cost of your health or safety.
1. Remove your carburetor from your vehicle or equipment
Before you start disassembling, take some time to note where everything goes so you won’t be struggling to replace any parts. Taking a picture before doing anything might be a good idea depending on how comfortable you are with relying on your memory.
To start taking out your carb, you’ll want to first turn off your fuel valve. Then find the fuel line on your carburetor and disconnect the hose. (If you find that this hose is cracked, it’s time to replace it.) Also disconnect the overflow hose coming out of your carburetor. 1
Remove any screws and clamps attaching your carb to the engine block so that you can completely pull the carb out. 1
You may want to use a rag to plug the hole left behind to prevent debris or small items from falling in. 2
If there’s any fuel left in your carb, drain it out. 2, 3

2. Remove the carburetor float
There are two parts to this. First is the float bowl, which you’ll need to unscrew and take off. There may be a gasket in there—if you’re planning on replacing the gasket, no worries, but if not, take care that you don’t tear the gasket. If you see gunk inside the bowl, you’ll want to clean it, but you can save that until a bit later if you want. With the float bowl off, the actual float should be exposed. There will be a hinge pin holding it in place that you’ll want to remove using a needle nose pliers before taking out the float. 1, 3
3. Take out the jets
Your carb has two jets, which are tiny channels that help deliver a mix of fuel and air into the engine.
The wider jet you’ll see is the main jet. Remove this with your flathead screwdriver. Hold it up to the light to see if there are any clogs. 1, 3
If you do see obstructions, set it aside to be cleaned. Do the same for the needle jet underneath the main jet. Then repeat these steps for your pilot jet if it’s removeable, especially since it’s the smallest passage in your carb and the first to get clogged if fuel goes bad. 3


4. Take out mix and idle screws
For your mix screw (also called the air screw), before removing it, tighten it and note how many turns it takes to be fully tightened. Then you can unscrew it. Watch for a spring, O-ring, and washer that sometimes come with these screws. 3
Now remove your idle screw. 1
5. Clean everything
With the above components of your carb removed, it’s time to give everything a cleaning.
Before beginning, double-check to make sure all gaskets and O-rings have been removed, and be sure to follow instructions for the cleaners you purchased. 1 Now is also the time to don that protective gear.
You can soak your carburetor parts in a chemical dip to clean them. Alternatively, you can spray carb cleaner throughout the various channels in your carb (such as the spots where the jets, float pin, and air and idle screws were). Also spray cleaner through any dirty jets. 1, 3
For the exterior, if you didn’t soak it, you can use carb cleaner spray and an old toothbrush or a wire brush to remove grime. 3
Don’t forget to clean your float bowl if you didn’t earlier. You can use the same spray and toothbrush method you used for the exterior. 3
For the jets, you may need to use a wire to thoroughly clear them out. However, be sure to use a wire made out of a material that is softer than the material your jets are made from (usually brass). 3
Don’t get any carb cleaner on plastic parts or rubber seals. 3
Use compressed air to remove any extra debris and dry your components. 1, 3
6. Reassemble your carburetor
Replace the parts that you removed in reverse order. 1
When replacing your air screw, tighten it completely and then loosen it the number of turns it took you to tighten it earlier. 3
As you’re reinstalling components, you may want to replace various seals and gaskets—this is the simplest way to “rebuild” your carburetor. 2
7. Reinstall your carburetor (and take care of it from now on)

There you have it! You’ve successfully cleaned your carburetor and hopefully solved your engine woes with your pressure washer, lawnmower, or other power equipment.
However, you could experience the same problems going forward if you don’t invest in some preventative measures. First, replace the fuel in your tank so that your carburetor will have fresh fuel running through it. 1
You may also want to use a fuel stabilizer to keep your fuel good for longer and prevent clogs. 3
Conclusion
Cleaning your carburetor could be the fix you need to get your equipment to start more smoothly. It's definitely worth a shot when your small engine struggles to start, whether that's a go-kart, pressure washer, lawnmower, snowblower, or more.
Got questions on any of these steps, or are you still having trouble with your engine? Contact our customer service team!
We also have a few troubleshooting guides for various types of equipment you may find helpful:
- Mower troubleshooting
- Pressure washer troubleshooting
- Snowmobile troubleshooting
- Other carburetor and fuel system issues
If you need it, you can also check out our variety of replacement carburetors to get your outdoor power equipment running again.
[REVISED 3/2023]


Having trouble using your ROP Shop pressure washer surface cleaner? These tips can help you out.

Thinking about getting a pressure washer? Here are eight advantages to owning a pressure washer to help convince you.

Installing a new pressure washer pump doesn’t have to be a hassle. Let The ROP Shop walk you through it.

Ready to learn how to pressure wash quickly, effectively, and safely? Check out these eleven tips.