How to cut chipboard without chipping with a jigsaw
What saw and how to evenly saw chipboard with a jigsaw without chipping
It is necessary to note at once that it is difficult to make an even cut of the table top with a jigsaw. The kind of sawing that will be comparable to that of a circular saw. It is possible, but it is more difficult to achieve than to cut a tabletop with a circular saw.
Special saws are an important element in obtaining a smooth, clean and even cut of the tabletop, using an electric jigsaw. You need thick saws with a fine tooth pitch for this kind of work. The thickness of the saw blade is needed so that the cut would not “walk” vertically, i.e. was perpendicular to the surface of the table top. Actually this is the main problem when sawing worktops with a jigsaw. the bend of the saw at the bottom of the kerf and departure of the cutting line from the vertical.
Small tooth pitch is needed to avoid chipping on the cutting edges.
Most saws for jigsaws that are on sale have thickness from 0.9 to 1.3 mm. If you saw a tabletop with this saw 30-40 mm thick chipboard, it will bend and the cut will be vertically slanted. And the deviation can be very big. up to several millimeters. The size of the “sink” depends on the thickness and density of the chipboard.
Leading manufacturers have special saws that make precise (vertical) cuts. Thickness of such saws is increased up to 1.7. 1.9 mm.
Causes of chipping
If you observe the process of chipping, you can find a pattern: when sawing from the top down, the saw teeth do not saw through the material and do not form chips as they come out of it. When sawing from the bottom upwards the teeth get caught and create splinters.
In the wood material, the fibers next to each other get caught, and in the Laminated chipboard, the coating and chips get caught. If you try to saw two layers of Laminated Wood Chipboard at the same time, the layer underneath will cut well, as the layer on top counteracts splintering.
The “Soft start” option, where the jigsaw speeds up gradually and the sawing progresses as it should, helps increase accuracy. Move the tool slowly. Continuous visual inspection of cutting and marking points is required.
What tools to use?
If there is a question how to saw a tabletop, then in the first place it is necessary to decide on a tool for cutting, and more often several tools are used.
For example, using a circular saw, you can get a perfect result, but it is quite an expensive pleasure, because a quality tool costs a lot of money. Therefore, this machine can be found mainly only in special factories.
Angle grinder. has a similarity to the previous tool, but the result will be far from ideal. In the course of work with an angle grinder it is possible to form a lot of chips.
Usually, to saw a tabletop, two basic professional and interchangeable tools are used. a jigsaw and an electric jigsaw.
Specialists in the field of construction divide the blades or, as they are also called, saws into two main categories:
In the case of working with a tabletop, you will need the variant that rips on one side.
Before you get down to the main work, it is necessary to sharpen the tool blade well, so that no chips are formed in the process of work. Before you begin to saw directly into the material, you must make a groove with a sharpened blade, the depth of which will be about 2-3 mm. This makes it possible to work without injury or splintering.
Sawing methods Laminated chipboard without chips
Saw a laminated board should be a special machine (format-sawing). But its ) when it comes to home use. Budget options (hacksaw, jigsaw, etc.) can be an alternative.д.), which will take more time when sawing, but will require less financial investment.
Using a hacksaw
It is quite difficult to make a groove with a hacksaw at home. First you need to cut through a knife line for trimmer measuring and glue the tape on it. This will protect the top layer from damage. Point the tool at an angle of 30 degrees. Move the hacksaw back and forth gently, without excessive pressure. To saw laminated chipboard without splitting with a hacksaw at home, use products with the finest teeth. If it is damaged, the place of sawing should be passed with a file, guiding it from the edge to the center. And finally rub it with emery paper (fine-grained) and hide the defects under the flexible profile.
READ Chainsaw ignition coil test with multimeter
Sawing methods Laminated chipboard without chips
Sawing laminated board should be done with a special machine (format-cutting machine). But its ) if it is a question of use in domestic conditions. An alternative can be budget options (hacksaw, jigsaw, etc.).д.), which will take longer to cut, but will require less cash investment.
Using a hacksaw
It is difficult enough to use a hacksaw at home. First you need to cut the line with a knife for trimmer metering and tape over it. This will protect the top layer from damage. Point the tool at an angle of 30 degrees. Move the hacksaw back and forth carefully without exerting excessive pressure. To sawLaminated particleboard without chipping with a hacksaw at home, choose appliances with the finest teeth. In case of damage, the place of sawing should be passed with a file, directing it from the edge to the center. Finish by rubbing with sandpaper (fine grit) and hide the defects under the flexible profile.
READ Testing a chainsaw ignition coil with a multimeter
Sawing rules
Before sawing, choose a method, as well as accessories and tools.
- duct tape;
- Painting tape;
- pencil, ruler;
- sandpaper.
- hacksaw;
- milling machine;
- circular saw;
- tire;
- jigsaw;
- sawing machine.
- On the end part of the chipboard, apply the points. You need to determine in advance what type of cutting will be done. straight or shaped. Sawing technique is different for them.
- Connect the points in the line for the trimmer and glue the adhesive tape on top. SawingLaminated chipboard preferably with adhesive tape. It will reduce cracks when cutting, as the wooden board is subjected to strong pressure with an increase in temperature.
- Saw the board. The accessory is set at the right angle to achieve extremely smooth edges. The process must run smoothly, rhythmically and without heavy pressure.
- Trim irregularities and edges, if necessary, with a file and rasp. The edges can be glued with a veneer of the appropriate color. This will ensure their protection and look prettier.
Only after placing all the necessary tools on the table, you can begin sawing.
Using a router
The router is an electric tool, for manual woodworking. Suitable for grooving, shaping, edging and drilling. Before using it, a sheet of wood is sawn with a jigsaw, 3 mm from the markings. Sawing with the cutter should be done with a bearing, which forms the depth of cut to the required level. This is a time consuming process, which can only be accomplished by experienced professionals. There is a high risk of crooked cuts.
Electric jigsaw
To make a clean cut on chipboard without splitting, choose a jigsaw with the smallest jigsaw blade. It is used for small sections of tiles, with smooth movements without pressure at low speed. If you are using the jigsaw for the first time you might see some cracks on the backside of the board. With further use the quality of the cut will improve.
Sawing with undercutting
The process requires a guide rail. a stop ruler. It is fixed on the board with clamps. Trimming is carried out according to the markings. The bar is set along the mowing line and the cut is made 10 mm deeper. Make the second cut right through. With this method, there will be no chips on either side, as the laminate has already been cut on the underside.
Some elements used in design ideas are not cut in a straight line, but in a curved line. In this case, a mixed type of cutting is used Woodchipboard.
Cropping with a panel saw
The workpiece is placed on the table and fixed in a fixed position. The necessary markings are made on the sheet and the sawing assembly is turned on. When the saw blade reaches a sufficient speed, the table moves forward with the wooden boards and hits the saw blade
Machines for cutting particle boards are divided into 3 types:
- Pedestal. is the fixture that supports the entire machine. A heavy frame adds stability and eliminates vibration. Important for a quality cut.
- Sawing unit. consists of 2 flat metal discs. The first one pre-saws the panel and the second one finally cuts through.
- Working tables. Three are involved in the process. The first. for the location of the assembly, the second. to feed the sawn boards (movable), the third. to support the sawn parts.
- Carriage. allows the moving table to move. In this case, the workpiece is fixed with a stop and rulers in the desired position.
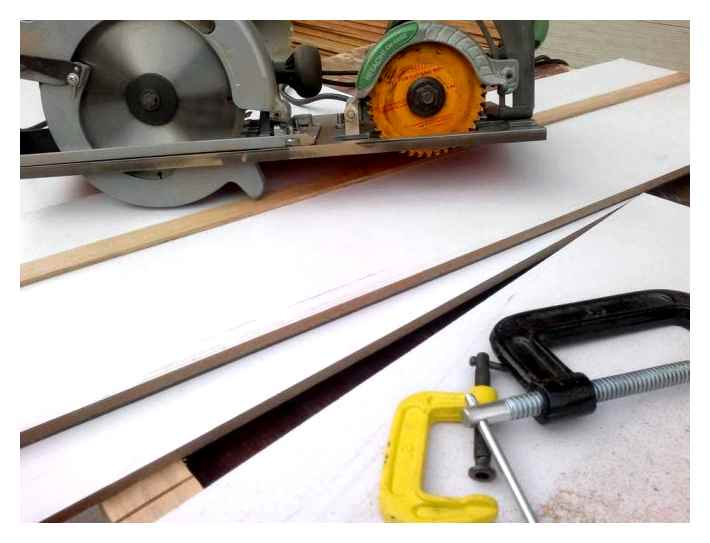
Step 1. Sawing along the guide
Set the guide rail on the workpiece, set the cutting depth and make the kerf. As you can see, even on the outsides of our chipboard there are no signs of chips or undercuts. The kerf itself is even, with no signs of burrs or side waves. Why the difference?
How to bend chipboard. a practical aspect
Sometimes you need to make a bent piece of particle board. the end face of a table, cabinet, shelf.
To do this, you must first cut the required piece of material to size, and then make numerous parallel cuts in the interior surface of the piece (see “Setting the guide line”). Fig. 1 и 2)
The right piece Making the kerf
To make a curved shape, the resulting part should be glued to the template with PVA glue and secured with self-tapping screws. After the time required for the glue to cure, the part can be removed and used for its intended purpose.
Before screwing self-tapping screws into the chipboard, it is advisable to pre-drill the material. Drills with 1-2 mm smaller in diameter than the self-drilling screw are used for this purpose. Drills for chipboard are used the same as for drilling wood, and self-tapping screws are bought as standard.
Due to the lower cost of chipboard than other installation and construction materials, a small number of defects when working with their own hands is not critical. Spoiled sheets can be used to make smaller items, without the cost of hiring professional equipment and specialists.
We bought a coffee table recently, the price is inexpensive, but there is a “but”. The height of the table for our interior is too high. It would be good to reduce the height of 10 centimeters. As they say, we are not looking for easy ways, decided that
I remembered that there is a specialist asoleg on our site who has done. I’m a long way from him, but a few tips might help. I contacted him, explained the problem and he kindly shared his secret. With his permission I publish his technique for cutting furniture chipboard without chipping.
Sawing Laminated chipboard without chipping. The magic zero insert! Announcement
It turned out to be banal and simple. Marking the line for the cut trimmer. After that, using a clerks knife, we cut through the top layer of chipboard with a ruler. We simply run the knife a few times with a little force over the trim line of the cut. (I recommend to practice on a scrap part of the chipboard) If you put too much pressure, the decorative layer will swell and it will not be very nice.
Next, stepping back 1-2 millimeters from the outlined mowing line toward the rough part, we cut with a jigsaw or a suitable saw with teeth pointing toward the handle of the saw. Make a notch on the opposite side of the cut to prevent chipping when completing the cut. Sawing all the way through. Sawing
How to saw chipboard without splitting
To saw evenly and splinter-free chipboard at home, you need to know a few tricks. Without a doubt, it is better if you will be sawing with an electric jigsaw. Of course, you can saw with a hacksaw, but the result is unlikely to please you, although to saw chipboard possible for various purposes, where the quality of a cut does not play any role. And so, we need a smooth and beautiful cut. To do this we take a jigsaw, a ruler, a tape measure and an angle bar for right angles (if it is necessary), an awl or a sharp object with which to trace a fishing line for a laminate trimmer on the chipboard. We measure a part that will be sawed off with 1-2 mm reserve on the subsequent adjustment and apply a ruler, on it we spend with an awl or a sharp object a line for a saw trimmer, try to press harder to cut through the laminate, and we saw along the line not along the line itself, but exactly along, only catching it with the edge of the saw.
Then with coarse sandpaper bring the edges of our saw cut to the right condition and, if the quality of the sawn end is not satisfactory to you, take a wax chalk of the desired color t.е. in the color Chipboard and grind up the chips. Let’s talk about jigsaws, I personally use BOSSNevsky.
If you need to saw without chipping only one side, you can use saws as a tooth up and down, I use a small saw with a straight tooth they shear less and cut both sides pretty decent. It will be more convenient to work on the sawn end with the sandpaper, if you stretch it on an even bar. Furniture wax crayons and markers you can buy in furniture stores, where they sell fittings. If you can’t find the color you want. Don’t worry, you can make it from several other colors by mixing it like paints. Simply melt crayons with a candle and drop on a plate, one color on it another, then roll into one and rub the edges with chips, remove the excess with a ruler or knife and polish with a rag gently, no need to press hard.
Why chips appear
Before you cut laminated chipboard or laminate with an jigsaw, you need to understand why chips form when you are sawing sheet material. And the answer is simple: it is in the design of the jigsaw, or rather in the design of the file.
So, in the process of cutting, the jigsaw receives reciprocating movements (up and down). While chipping is almost non-existent if the file is moved in the tooth travel (usually downwards), when it is moved in the opposite direction the teeth seem to tear off the upper layer of the material and create an ugly splinter. That is why you can observe a nearly perfect cut on the underside of the laminated chipboard and a cut with chips on its upper edge.
Ways to minimize chipping
An additional reason of chipping can be the tooth separation of a file. That is why it is necessary to take care about obtaining a tool with straight cut (often it is Bosh saws). However it is necessary to take into account that such saws overheat and can even bend in the process of cutting if you work for a long time. In view of this it is necessary to take breaks in work for cooling down of the cutting tool.
However, one saw blade replacement is not enough and in order to cut Laminated woodchip board (laminate) with an electric jigsaw without chipping you need to do some fine-tuning of the electric tool. Namely to make sure that when you move the saw against the inclination of the tooth, the material does not tear out. For what it is enough to make a landing pad. This is the conclusion you can draw from trying to cut two sheets of laminated chipboard at the same time. On the lower element there will be practically no chips.
In order to make a stop for an electric jigsaw it is enough to saw a rectangle of any dense material (for example, from laminate) with dimensions identical to those of the electric tool’s soleplate.
Then it is necessary to make a notch along the greater axial line and fasten the obtained tooling to the sole of the jigsaw with an insulating tape or double-sided adhesive tape. All finishing is ready and you can perform finishing works with observance of certain recommendations.
Why do chips appear?
Before you cut laminated chipboard or laminate with an electric jigsaw, it’s a good idea to understand why chips form when cutting sheet material. And the answer is simple: it all lies in the design of the jigsaw, or rather in the design of the file.
So, in the process of cutting the file receives a return motion (up and down). If the saw moves in the tooth travel (usually downward) and almost no splinters appear, when the tool moves in the opposite direction, the teeth seem to tear off the top layer of the material and create an ugly splinter. That’s why you can observe the nearly perfect cut on the underside of laminated chipboard and a beveled cut on the top edge.
Ways to minimize chipping
Additional reason of splintering can be a gap in saw teeth. That’s why the first thing to do is to buy straight-cutting tools (often Bosh saw blades). However, it should be noted that with prolonged work, such saws overheat and can even bend in the process of cutting. Because of that pauses should be made for the cutting tool to cool down.
However, one saw blade replacement is not enough, and in order to cut laminated woodchip board (laminate) with an electric jigsaw without splintering it is necessary to do some fine-tuning of the electric tool. Namely to make sure that when the saw moves against the inclination of the tooth the material is not torn out. For which it is sufficient to make a thrust pad. Such a conclusion can be reached by trying to cut through two sheets at the same time Laminated chipboard. So there will be almost no chips on the lower element.
In order to make a landing pad for an electric jigsaw, it is enough to saw a rectangle of any dense material (for example, laminate) with dimensions identical to those of the electric tool’s soleplate.
Then a notch should be made along the larger centerline and the resulting tooling should be secured to the jigsaw foot with insulation tape or double-sided adhesive tape. All finalization is ready and you can perform finishing work in compliance with certain recommendations.
sawing rules
First you need to choose the sawing method.
It is obligatory to make the following preparation (cutting):
- To protect the laminated coating of the board from damage during the work, you need to prepare masking tape or tape;
- For the marking of workpieces. a ruler and a pencil;
- From the ends of the board mark with a pencil future cutting points;
- To avoid the appearance of chips, you need to glue on the place of sawing with masking tape or scotch tape;
- After taping the tape, connect the pre-marking points with a pencil;
- Prepare sandpaper for the final cut.
The following rule is not related to the preparation, but to the post sawing, and is common to any method: if you find roughness on the edges they need to be processed with a file or rasp. The ends resulting from the sawing should be covered with a veneer with a pattern similar to that of the laminate coating.
What not to saw
Laminated chipboard must not be cut with an angle grinder, also known as an angle grinder. There is a high risk of injury when using this tool, especially with large-diameter blades. Injuries can also occur when the tool guard is removed.
Sawing techniques Laminated chipboard without splintering
Sawing can be done on a panel saw. But its If you need to saw Laminated chipboard to make a few pieces of furniture for yourself, other methods are more suitable.
Scratch
It is necessary to scratch a ruler with an awl or a nail to the thickness of the laminated surface with a trimmer line. Sawing along this line, making sure that the edges of the saw’s teeth hit exactly into the scratch. Sawing can be done with a jigsaw or a hand hacksaw.
Jigsaw
Suitable for cutting a small length. A saw must be the one with the smallest tooth size. It is necessary to move the jigsaw smoothly, without pressure, to set the rpm a little bit higher than the average level.
On the side where the teeth enter the board, there will be almost no chips, and on the opposite side, with little experience, they will appear, but in small quantities.
Circular saw
A fine-toothed saw blade is needed. With this method, long straight cuts will be more successful than with the jigsaw. No splintering on the side where the teeth cut into the board. If they appear, it is on the opposite side, just like with the jigsaw.
The use of guides increases the accuracy of the sawing. It’s best to secure the saw to the table when doing this.
Sawing with undercutting
You need a large ruler (bar), which is fixed on the workpiece with clamps. The first cut is made to trim the laminate along the marking line. The guide bar should be set on a line and the cut should be about 6-10 mm deep. no splintering.
The second cut is straight through. No splintering where the teeth enter the board, but where they exit, the laminate has already been cut, so there can’t be any.
Cutter
In this case, you should first saw through the workpiece with the jigsaw, stepping back from the marking line by 2-3 mm, and then align the trimmer line on the template. The cutter must be equipped with a bearing. You can also cut in a curved line with this method.
Getting the job done
When the saw has been chosen, it is still necessary to correctly saw the laminated board at home. Connoisseurs recommend sawing along a guide rail (a rail clamped in clamps is also suitable). If a new, unworn blade is used, it is possible to cut chipboard as cleanly as with a circular saw. It is advisable to set the jigsaw to the lowest rpm possible. This will substantially increase the life of each saw that is used.
The blades themselves are placed at right angles to the jigsaw blade. The easiest way to check the angle is to use an angle piece or protractor. Important: The straight line through the cutting edge of the tool must be parallel to the rigidly fixed part of the jigsaw. We recommend the use of special inserts that reduce the likelihood of splintering. But to make them work more effectively, they usually notch the laminate layer on the side where the blade will go out.
On how to saw laminated chipboard with a jigsaw without chipping, see the following video.
Make the kerf without stopping
It is desirable not to stop during the sawing of wooden parts. The circular saw must run smoothly over the material and not interrupt. Otherwise, the boards will be left with irregularities and cuts, which will prevent further use of the wood.
The movements should be smooth and soft, so the blade does not dull and goes evenly across the board. It is also advisable to check the length of the cord beforehand. If it does not reach. use an extension cord. Otherwise the wood will also not be cut evenly.