How to cut plastic ceiling plinth in the corners
With what and how to cut a plastic skirting board
The skirting is the element that gives the finish a finished look. The junction of the walls with the ceiling and floor must be made extremely accurately and beautifully. Know how to choose the right baseboards, coordinate them with the walls, floor and ceiling, assemble the corners.
Plastic skirting boards replaced wooden ones that were used in previous years. They have a number of advantages. They are made of polyvinyl chloride (PVC), a material that is widely used in industry and construction. Externally they imitate any species of wood. Easy to process, easy to install. Not susceptible to mold, mildew, damp, easy to clean. They are much cheaper than wood.
Plastic skirting boards come in different shapes and colors. There is a difference between skirting boards from different manufacturers. An appropriate cutting technology must be applied to each specific product.
There are types of plastic skirting boards designed for a particular floor covering. carpet, linoleum or parquet.
Ceiling skirting boards are usually made of dense plastic.
How to choose the right tool for trimming a plastic baseboard
To work with plastic baseboards need the most common tool, which is available to any master and even many men of the household.
Hand tools
Hand tools come in handy for work with a fine-toothed wood hacksaw for cross-cutting, a hacksaw for metal, a hand drill, screwdrivers, sharp knives, scissors. All tools must be sharp, otherwise you can simply jam the edges of the cut. If no skills are available, you should practice on scraps of material with different tools.
Power Tools
Among electric tools, you can use an electric jigsaw, an electric drill, an angle grinder.
How and what to cut plastic baseboard. 3 of my favorite ways
SlavagodM May 17, 2016 Specialization: master of interior and exterior finishing (plaster, putty, tile, drywall, laminate, and so on). In addition, plumbing, heating, electrics, conventional tiling and expansion of balconies. That is, the repair in an apartment or house was done “turnkey” with all the necessary types of work.
On the question of what to cut the plastic baseboards can be answered rather briefly and unambiguously, pointing to a hacksaw for metal, but it will still not be completely accurate information. After all, by and large, there is an implication in this question, indicating the complete action, rather than the tool itself, so that without full familiarity with the process, the purpose of this or that tool is difficult to understand. So, I want to tell you about my own experience, gained over the years of practice, and in addition you can watch the video in this article.
Cutting corners of floor and ceiling skirting boards
Under the plinth in the Russian language means a decorative plank, overlapping the junction of the wall and floor (ceiling). The name comes from the Greek πλίνθος and the Latin plintus.
Tools and implements
Let’s start with the fact that cutting the baseboard at an angle of 45⁰, 90⁰ and others can be made with any cutting tools, but here, as elsewhere, there are their preferences:
- the most convenient tool, which leaves after itself the most qualitative cut, can be called a hacksaw for metal, and, moreover, it concerns not only plastic, but also wooden baseboards and skirting boards;
- thanks to the fact that the blade has rather fine teeth the cut is precise and the main thing is that it is very important for the joint of the profiles. the more precise is its processing the better is the joint as there will be no gaps;
- of course, as we said, the instructions do not necessarily indicate one or the other tool, so for plastic you can also use a construction knife;
- here are options, as such knives are similar in that they have a removable blade, but it can be of different thickness and length (for wallpaper, as in the top photo or for drywall);
- but in these cases such a tool is only suitable for thin-walled profiles. polyurethane, for example, cannot be cut with it.
Alternatively, you can use an angle grinder for cutting, and any disk will do. But this should not be seen as a rule, but rather as an exception.
A joiner’s saw with a full set of corners
For accuracy in fitting the joints often use a joiner for cutting baseboards, which can be different:
- The difference in the design of such a tool is the full or incomplete presence of all the grooves for corner cutting;
- The full set tool has 45⁰, 60⁰, 67.5⁰ and 90⁰ slots (its price is not much higher), while the simplified tool is all down to 45⁰ and 90⁰;
- In addition, a full-set jigsaw, as in the top photo, has grooves for cutting boards, which means that here you can easily cut the profile in the form of a flat slat.
What it looks like in practice. method one
So, cutting corners ceiling baseboard (or flooring) first of all comes down to the correct direction of the slope, as the joint can be internal or external, respectively, the configuration of the corner. Let’s understand it with the help of the image above. there, on the left and on the right two opposite variants are shown. the red color shows unnecessary (to be removed) parts of the profile.
If we are decorating the ceiling, the one on the left will do for the outside corner, and the one on the right will do for the inside. For the floor decoration everything will be identical, but exactly the opposite. the left will be the inside corner and the right will be the outside corner. In the middle between the variants the correct position of the processed profile is shown.
If you are using a joiner’s chisel, then the cutting of corners should be made at the edge of the tool closest to you!
The second method
The jointing gap should be minimal
But, as you have seen, the number of those or grooves for cutting corners is limited even with a full kit chisel, making such a tool simply useless in some cases. The fact is that in houses we often have to deal with the fact that the rooms do not have right angles, therefore a 45⁰ slope for the joint will not suit you, because after such a connection there will be a gap.
But there is a way out, and quite uncomplicated. you can mark the profiles with your own hands.
Let’s see how to fit the joint in the inner corner without the use of a joiner’s jigsaw, and for this we set the profile close to the mating wall, and along the ceiling we run a trimmer line, as shown in the top photo. Exactly the same operation is done on the other side, resulting in two intersected control lines, where the intersection will be the starting point for the cut.
The bottom point will correspond to the angle of the mating of the two walls. in the picture the line for the trimmer cut is highlighted in red.
If the corner is outside, the intersection of the marking lines will naturally be farther away, and you will not need to rest the profile in the adjacent wall, but to extend it beyond it to extend the line. Similar actions on the marking you will need to perform and for the floor skirting, only it will look in a mirror image, on the contrary.
When cutting ceiling skirting boards (flooring) without a jigsaw, by hand, the hacksaw must be directed to the center of the corner, that is, its slope will be about 45°⁰.
The third way
Similarly, with a slope, it is necessary to cut a profile for its extension in straight sections of the ceiling or floor and if you cut a slat under 90⁰ or even under 45⁰, you will see a gap. Therefore, you can in such cases, you can use a joiner with grooves at 60⁰ and 67.5⁰, that is, the length of the cut should be at least twice as long as its cross section.
What tools you can use to cut corners
Cutting the ceiling skirting (outer corner) with explanations will be a good help to the novice craftsman.
How to cut a skirting board without a joiner
Let’s say you urgently need to stick a ceiling plinth.
How to make a corner without a joiner? This is possible, but it does take more time. Proceed as follows.
- First cut both parts of the skirting boards at right angles.
- We mark out the position of the elements on the wall and apply a fishing line to trim them together. The result will be two intersecting lines. The point of their intersection is projected directly on the parts of the baseboard.
- The skirting board is applied to the ceiling and a fishing line is drawn to trim the cut from one edge to the other.
- Finishing parts is carried out with a stationery knife or a construction knife.
- On paper, a virtual jig is depicted with the drawing of lines at the right angles. Skirting boards are attached to such a notch and the cutting is performed (in doing so, the blade of the knife should be held vertically).
How to cut the corner of the ceiling plinth with Комментарии и мнения владельцев from a specialist will help deal with this problem.
Tip! Since the inner or outer corner is far from always perfectly shaped, the ceiling skirting will have noticeable gaps in the joints.
To make them less noticeable, plaster putty should be applied to the ends of the skirting boards before gluing them on. After the elements are joined, the excess putty is removed with a rubber putty knife. All gaps will be filled and the joint will be less noticeable.
It is not easy to glue and properly dock the tacks with the pattern. How to act in such a case? The answer will prompt a video.
A few recommendations
Any work has nuances, but they must not be perceived as trivialities. To ensure that the trimming went accurately and without problems, you need to pay attention to a few things.
- Correct measurements are the most important thing in any work. To mark the blanks for the inner corner, the measurement begins exactly from it.
- Before cutting the two strips for the outer corner, do not forget that behind it they will “look out” a length equal to the width of the products.
- Fixing the ceiling baguettes begin only after several checks. When the edges of the skirting boards come together perfectly, then you can begin to glue them (fixing screws).
- To correct the joined blanks, you can use files or files. For Styrofoam and both types of Styrofoam it is necessary to take thin, sharp-sharpened blades.
Since any debut rarely goes without mistakes, it is recommended to start with training on scraps. Therefore, when buying, it is better to add 10-15% to the length of the products. So you can guarantee that the material is enough not only for the preparation, but also to cover the entire room, even if flaws in the process still appear.
What to do if gaps remain?
If defects are detected after the work is done, very few people will like the prospect of redoing it. In this case it is easier to mask them with one of the compounds. The best option for such treatment will be the final acrylic putty. It has a white color and is very plastic. The material is taken with the fingers, then it is pressed into the remaining gap, gently distributing in the hole, smoothing. The remaining composition is removed with a damp cloth. As a rule, traces of imperfections at the joints are not left.
How to cut a ceiling plinth? Must be equipped with the necessary tools and patience, because the rush always provokes errors. The main thing in this case. the choice of the best way. But attentiveness and accuracy are no less important: baseboards are made of not too strong material (except for wooden baguettes). They are fragile, so excessive effort when working with such products is contraindicated.
On how to cut the ceiling plinth, will tell the author of the following video, which viewers consider the easiest and most understandable:
Selection of tools for cutting ceiling plinths
To properly and accurately cut the ceiling plinth, you need to use the right tool for cutting. It is chosen depending on the material from which the fillets are made:
-
Styrofoam. Characterized by low strength and costs relatively inexpensive, and therefore foam models are becoming increasingly popular. Their strength does not particularly affect the performance characteristics, because usually the ceiling plinth is not subjected to mechanical stress. A regular office knife is suitable for cutting.
It can be purchased in a construction store or make your own hands according to these instructions:
-
Three 5015 cm boards are nailed with a long edge into a shape of a three-sided, rectangular box. Pay attention, between the side planks and the transverse board must comply with the angle of 90 degrees.
To work with this homemade device was convenient and safe, planks should be well sanded before joining.
Technology of cutting ceiling plinths
For prompt and quality work, you need to pick up the tool in accordance with the material of the baseboard and choose a way of cutting. If you have a plier, there will be no special difficulties in the process. If you do not have one, you have two options: to cut using the template and measurements on the ceiling, or to make this tool yourself.
Features of cutting ceiling plinths in a wire cutter
Work with this device should be extremely careful not to dull the tool and not to leave jigsaws in unnecessary places. In the process, follow the following instructions:
-
Fix the baguette in the chair the way you plan to place it on the wall. The side, which will be pressed to the ceiling in the chair, must fit to the sidewall.
When cutting and trimming products of polyurethane foam and remember that these materials crumble and press through, so the tools must be sufficiently sharp, and strong mechanical stress on them is undesirable.
Technique of a cutting of ceiling plinths on a template
This method can be used if your corners. even, and you need to trim the baguette exactly 45 degrees. To do this, before you cut the ceiling plinth in the corners, you need to draw a jig on heavy paper. Draw two parallel lines and mark the angles at the desired degrees, using a protractor.
Position the tack in this case in the same way as in a traditional mortiser. Note that the skirting boards must be cut, keeping the tool in a strictly vertical position.
Rules for cutting ceiling plinths according to the markings
This method is used to cut the skirting boards in cases where there is no jigsaw, or parts from which it can be made.
To do this, you need to make a marking on the wall in this order:
-
We put a molding in the corner to the place of attachment.
When cutting in this way, it is important to accurately draw all lines and mark points. A mistake of even a few millimeters will cause a gap. This method is suitable for cutting and docking both inside and outside corners of the ceiling moulding.
How to cut a ceiling plinth without a pitchfork
To accurately dock in the inner corners of the skirting boards, you can do without a jigsaw.
-
We enclose the end part of the baguette to a sheet of paper and trace the contour of the convex side. It is more convenient to use a small piece of baseboard (if available).
Trimming ceiling skirting boards without a chisel
The walls in the room are not always straight, they may be between them not at all 90 °. How to cut a ceiling plinth in such a case? You can use a simple marking on the ceiling.
- Cut the skirting at a 90° angle, lay it on the ceiling, against the corner of the wall.
- On the ceiling surface draw the trimmer line over the batten with a pencil. Repeat the process with the second skirting board.
- At the point where the lines intersect, you need to cut the batten. A line for the trimmer should go to the part of the strip that is against the wall.
If you do not have a tape measure, you can measure the angle by hand
When cutting the ceiling plinth be sure to note that the inner corner is measured directly from the corner, and the outer corner will protrude into the depth of the room. Therefore, it is better to start with the trimming of the inner, and then move on to the outer corner. Glue the skirting board after the two joints formed by the counter skirting boards have aligned.
Not every interior design involves the use of a ceiling plinth, but more often than not the overall appearance of the room seems incomplete without it. In the attachment of this element. the fillet. there is nothing complicated, almost all types of baseboards are attached to the glue. But the question of how to trim the ceiling plinth in the corners of the premises, can puzzle many.
After all, even in the simplest rooms there are internal corners where ceiling skirting boards must be precisely and beautifully aligned. And in a more complex configuration of the room will have to dock the skirting boards, performing an external corner. In this article we will consider different variants, how to cut a ceiling molding with the help of hand tools and without them.
First, we should deal with the question of how to cut the ceiling plinth, the answer depends on the material from which the fillet is made. At the moment we sell ceiling skirting boards made of polyvinyl chloride (PVC), polystyrene foam (polystyrene foam), polyurethane and wood.
PVC ceiling skirting boards are the cheapest.
They easily form dents and creases that cannot be repaired, so the product has to be thrown away. Also their disadvantage is electrostatic. the ability to attract dust. They can be cut with a sharp construction knife or hacksaw.
Styrofoam skirting boards are also cheap. This material is very fragile, when processed easily crumbles, so cut the polystyrene foam must be a sharp knife or hacksaw for metal, not making too much pressure.
Extruded polystyrene skirting boards are slightly more expensive than polystyrene ones, they are denser and harder to cut. However, they are less crumbly, so they are easier and more convenient to work with. Can be cut with a construction knife and a metal saw.
Polyurethane skirting boards are the most expensive at the moment. They are strong, flexible and water-resistant, can be easily cut with a construction knife and do not crumble.
The disadvantage of polyurethane skirting boards is their dependence on temperature changes. For example, over a gas stove, a polyurethane skirting board will become permanently deformed and begin to crack slightly. If you try to trim or trim such a skirting, it may warp or otherwise deform.
Wooden ceiling plinths are dense, heavy products that can only be cut with a hacksaw, preferably with fine, frequent teeth. You can also use a canvas on metal.
Before proceeding to the listing of ways, how to properly cut the ceiling plinth, I would like to note that there is a possibility not to cut the plinth with special precision.
There are special corner elements on sale, into which the edges of the skirting board are inserted. In this case, the plinth trim is enough to trim at an angle of 90 °, and the corner element will hide all the flaws. But this method is not always used, because the size of the corner elements is somewhat larger than the skirting boards themselves, so the corners in the room will stand out against the general background.
Sometimes it can look tacky. Nevertheless, if the room design allows you to use corner elements for ceiling skirting boards, it makes sense to use them. The following instructions will be helpful to those who still decide to precisely cut the skirting boards to a given angle.
Useful tips
Finally, a few tips that may be useful to you before you start installing the ceiling plinth.
- To measure a baseboard plank between two corners, follow a simple rule: for the inside corner, measure the length directly from it, and for the outside corner from a point that is set back from it into the middle of the room by the width of the baseboard.
- Fix the skirting board to the ceiling and wall no sooner than fit a corner of the next board adjacent to it. Trying on pieces is much more comfortable on the floor than on the stepladder under the ceiling.
- Be prepared for the fact that the cuts will have to be adjusted several times. Exercise patience.
- Do not be afraid to leave small gaps in the corners: they can easily be puttyed. Exceptions are wooden ceiling skirting boards made of noble wood: against the texture, even a putty matched to the tone will be noticeable.
Even if you cut the skirting by the risks by weight. the remaining gaps can be covered with putty
Note: in general, all the hassle of fitting baseboards can be easily avoided. For the corners are often sold inserts, which are connected to the baseboard cut perpendicular to the axis.
If you still don’t quite understand how to cut ceiling plinth corners, videos of cutting and installation are easy to find on the Internet. Visual demonstration of all stages, we think, will dispel all confusion. Good luck with the repair!
Finishing the finishing work in the room? In that case, it’s time to think about how to cut the corners of the ceiling plinth. After all, it is from this element of finishing depends on how aesthetically pleasing and finished the interior will look.
How to properly cut the corners of the baseboard: consider their appearance
To cut a corner, you need to have a clear idea of the order of installation of each element. The procedure depends on what kind of conjugation is performed: external or internal. Attention deserves not only the direction of the cut, but also the spatial arrangement of the element. That’s why when you’re thinking about the sequence of operations, you need to know which corner we’re talking about.
Cutting an inside corner
To cut an inside corner for a plastic skirting board, you should act in the following sequence, given in the table.
When forming the inside corner on the ceiling plinth blade direction does not change, but the element itself is applied to the inside, and the lower part should be placed on top.
filing outside corner
Sawing the outer corner is performed in a slightly different sequence.
Attention! The ceiling corners are sawn in the same way as the internal ones.
How to adjust the angle of more or less than 90 °
No matter how versatile the baseboard tool is, it is designed to form a joint with a standard corner size. If the joint is carried out at a different degree, there may be difficulties. Watch the following video to learn how to fit the mating in this situation:
Useful tips for skirting board fitting
The installation procedure depends largely on where the baseboard is attached. To securely fix the product to the floor or ceiling surface, read our tips.
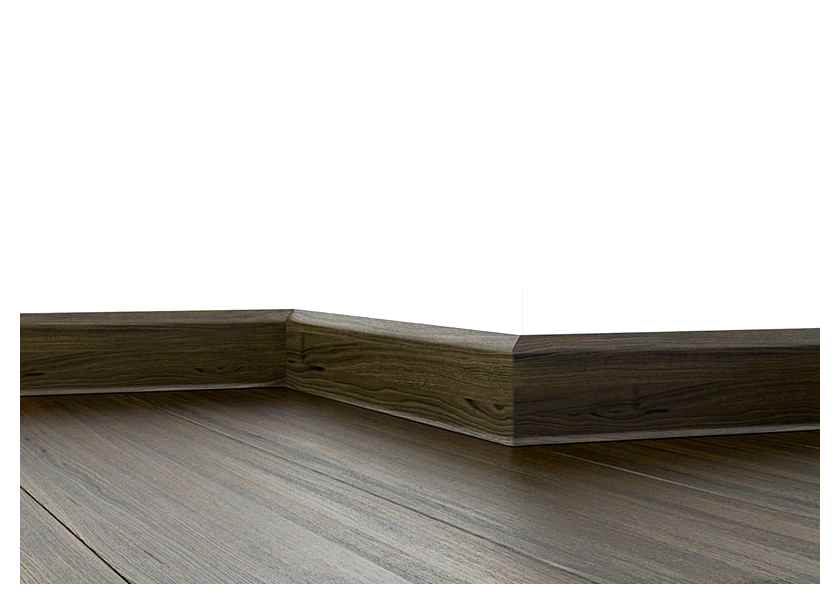
Floor plinth
To install a skirting board, you should buy the necessary accessories along with the product itself.
Depending on the squareness and shape of the floor must be available:
- Outer and inner corner of the same color as the main profile.
- Left and right end.
- The connector by which the straight sections will be joined together.
To fix the panels, you should prepare dowel nails. Their number is calculated on the basis of the length of the future construction. Step between fasteners 25-40 cm. If there are noticeable irregularities on the wall, the distance is reduced, ensuring that the desired curvature is formed.
Before starting the installation, you should prepare the walls. After that you can proceed to installation. The installation usually begins with any free corner. After checking the correct position, remove the upper part, mark the location and drill holes for fasteners.
After screwing dowel nails, the decorative plank set in place, pressing until the appearance of the characteristic click. The other parts are installed in the same way, and the filler elements are installed at the joints.
Ceiling plinth
The fixing of the ceiling plinth is most often done by gluing. Watch the following video, if you have decided to do the work yourself:
Share in Комментарии и мнения владельцев, have you had to cut and mount the skirting board yourself, and what tools and method did you use?
Do you want to know all the secrets and subtleties of how to glue ceiling skirting boards? Tips of masters, recommendations on the choice of material, step by step instructions and photos of finished work will help you to qualitatively carry out the installation of the skirting board.