How to saw a tabletop for a sink. How to cut a hole for the sink in the countertop
Inserting the kitchen sink into the worktop
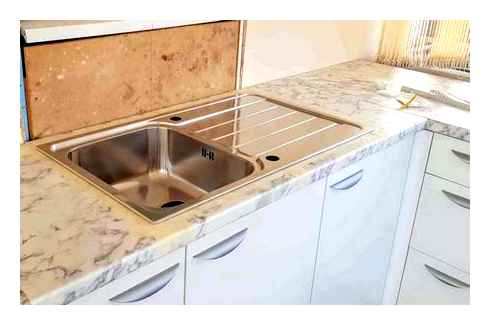
In this article we explain in detail how to insert the round sink into the worktop, which is 25 mm thick.
Step 1. Determining the position of the sink in the worktop. Then we turn the sink over and outline it with a simple pencil:
Step 2. From this outline, step back 10-12 mm and draw a smaller outline. On this contour we will make a kerf.
Step 3. We need to take a screwdriver or a drill and a 3-4 mm diameter drill bit and make a lot of holes around the contour. This way it will be easier to make a straight cut with the jigsaw:
Step 4. Use a drill with a diameter of 8-10 mm and make a hole through which you are going to put the jigsaw blade:
Step 5. Insert the jigsaw into the hole and make the cut all around the contour:
Step 6. We treat the ends with sandpaper and apply sanitary sealant:
Cutting out Kitchen Sink Hole in Countertop
Step 7. On the reverse side of the sink, glue the sealing tape that is included in the package:
Step 8. Install special fasteners in the sink eyelets:
Step 9. Installing the sink in the countertop. Tighten the fasteners. The bolts must be tightened diagonally.
Installing the sink in the countertop by yourself. the steps of the work:
High-quality fastening of the structure is determined by such factors:
Important! Moisture is aggressive to the material from which the cover is made, especially to particle board. If the sink is properly assembled, it won’t swell or shrink, which can significantly extend the sink’s lifespan.
Features of the connection of the communication
The next action is to attach the fixture to the countertop for the subsequent process of installing faucets and hoses. The trap is fastened to the pre-installed sink for practical use.
Included with the sink should be specialized hinges for the screw clamp, they will be in the form of legs. With their help you can much more tightly and reliably tighten the edges of the construction to the countertop. Do not tighten the fastening devices with screws with great force. If you overdo it, the rims of the sink may bend upward.
The place for the cut should be chosen taking into account the minimum distance for draining water into the sewer and water supply connection.
Sinks of round and angular shapes
Here are some installation peculiarities. Use the following instructions, which you are already familiar with. But! If the sink is round, technological holes are arranged in increments of seven to ten centimeters. This will allow you to perform the cut without much difficulty. You’ll be lucky if your sink comes with a template to cut the necessary hole.
The corner variant of a sink also requires some increased attention. If the corners are less than 90 degrees, then the technological drilling is performed quite heap on the corners.
Granite sink. a special story. The participation of professionals is definitely required here, such work cannot be done on your own. After all, in the sink will have to cut a hole under the sink drain. and this at home can not do.
How to saw plywood without chipping with a hacksaw?
For this, the material must be firmly fixed on the workbench. It is also recommended to treat the place of the upcoming cut along its entire length:
- PVA glue, using a brush 1-2 cm wide (you can start sawing after it completely dries);
- Using a sharp knife, making two parallel grooves.
To speed up the process, PVA can be replaced with duct tape or masking tape.
If the option “two grooves” is chosen, they are applied with a sharp knife, under the iron ruler, in three steps. The cut is made between parallel lines, preventing the appearance of chips. The load of the hacksaw blade should be on the plane of the plywood sheet.
The first step. marking
Determine the place on the countertop for the sink. The sink must not rest against the wall, but be at the very edge. But the main thing. in its position it should provide ease of use. Turn the sink over and place it on the countertop and draw the outline. This is done with a pencil, traces of which are easy to erase later. After that we measure the distance from the edge of the sink to the mounting eyelets. The same distance must be taken from the line we drew to the inside of the outline. On the resulting marks we mark a new contour. the inner contour. The obtained “internal” figure we will cut out to install the sink in its place.
We saw out the unwanted part of the countertop under the sink. This is best done with an electric jigsaw, but you can also use an ordinary hacksaw and then trim the edges. To insert the cloth into the countertop, drill a hole inside the contour, close to the line. If the blade doesn’t fit, you need to enlarge the hole. After that start sawing along the contour line.
When sawing, pay attention to the fact that the decorative coating of the countertop did not feel too much pressure, saw carefully, otherwise a lot of chips on the front surface will be formed. However, that’s what happened to me when I first self-cutting sink.
The step-by-step process of tapping
Preparatory work. it is quite simple, but it takes quite a lot of time. If you properly embed the sink in the kitchen drawer, then you will not have any problems with leaks or swelling of the countertop material.

To get a neat hole, you should adhere to the following rules:
- For the marking it is better to use a factory or homemade template.
- It is necessary to choose the place for installation responsibly. It is desirable to determine in advance where the sink will be installed, in order to perform the correct distribution of pipes. This will also allow you to see which elements need to be trimmed. Keep in mind that the supporting elements should not be touched.
- When using a template, it is necessary to fasten it firmly to the countertop, so that it does not move accidentally. You will need to cut along the drawn line. When indenting from the contours (if a homemade template is used) always take into account the distance to the fasteners. This will make the hole as close as possible to the parameters of the bowl.
- Some people do not draw the outline when using the bowl template. It is acceptable, but such work is more complex, so it is worth spending more time and draw the contour on the countertop.
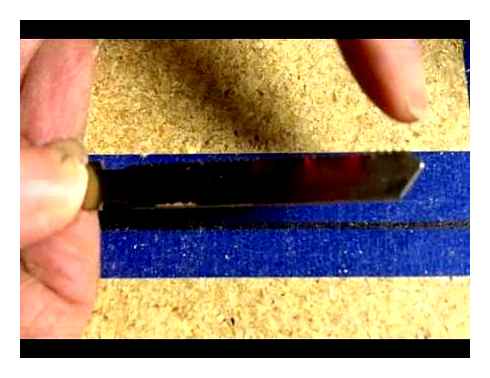
- When making a kerf along the cutting line can be chipped. To avoid that, you can stick painter’s tape on the contour in advance, which can then easily be removed.
- After sawing is complete, the edges of the hole are machined. For this, it is better to use sandpaper.
- In the final step, it is necessary to treat all edges with silicone sealant. This material will perfectly protect the cut ends from water, which will not let the countertop start to collapse.
The minimum distance from the wall to the edge of the sink should preferably be 10 cm. This will not allow the vulnerable places to be damaged during installation.
Drilling Large Holes in Stainless Steel the Easy Way
The location of the sink in the countertop can be chosen in several ways. But the basic principle that unites them is to observe the geometry of the bowl and the hole. It is obligatory to take into account the individual features of a particular model.
How to cut a countertop for a sink
It takes a lot of time and work to install the sink into the countertop. But if you properly cut the hole in the furniture unit and perform the installation, washing dishes won’t seem like such a burdensome task. Below we will talk about how to cut the countertop under the sink.
Making and using a template
Ready-made template for a sink
The process of installing the sink into the countertop consists of several steps. To properly perform this labor-intensive work, you need to carefully cut a hole in the countertop, and it is desirable to adhere to the following instructions.
- Firstly you need to buy a blank sheet of cardboard of the required size from which the template will be cut out. This working step will be simplified if the manufacturer, which is often the case, he himself has made a template and put it in the package with the product. All that remains is to cut out the template with scissors according to the outline drawn. If there is no template, you need to take the sink, turn it upside down, put it on the cardboard, then using a pencil to draw the necessary outline and cut the template on the finished contour. If there is no package with a drawing, and do not have the necessary sheet of cardboard, outline the inverted sanitary ware is carried out directly on the countertop.
- Next, you need to assess the future location of the furniture unit. It is necessary to know in advance where the faucet will be installed, how to do wiring, whether the countertop trimming is expected before the final installation. Also it is necessary to look over the construction of furniture from the inside. This will determine which elements can still be trimmed if necessary, and which cannot be touched. the supporting fragments of the tabletop must remain intact and untouched.
An indentation must be made
It is recommended to place the sink at a distance of 10 cm from the wall, which will protect the vulnerable places from possible damage in the future during installation.

- If the template is ready, it’s time to use it. To mark the worktop, the template must be affixed to the surface of the worktop and it must not move. After this operation the outline is drawn. The same work is done if the factory template is available. You will be able to cut along the marked line at once. If cardboard is used or the inverted sink was traced with a pencil on the countertop, more work is needed. The fact is that the conducted line for the trimmer will repeat the edges of the sink, and its bowl will be inserted into the future hole. So it is necessary to draw another contour. the inner one. When drawing it, you need to take into account the distance from the edge of the sink to the elements of attachment of the sanitary device. The result is a new template that is oriented to the size of the bowl. It is applied to the surface of the tabletop and a new contour is drawn, along which the hole can be sawed out.
- There is a variant in which a cardboard template is attached to the surface of the countertop and a hole is sawed along its edges. If you look at such work from a practical side. it is inconvenient. it is better to draw the outline with a pencil. When cutting along the drawn line, there is a real possibility of chipping on the inner edges of the tabletop. To avoid defects it is recommended to glue a masking tape on the surface in the area of the outline, which can be easily removed in the future. To start sawing, you need to make a hole in the body of the countertop with a drill from the inside of the drawn line. In the drilled hole the jigsaw blade is pulled through, and then it is fixed in the tool. Sawing should be accurate and without haste, as when pressing the blade can go sideways from the intended contour.
- The resulting cut is cleaned with sandpaper, blown out and thoroughly lubricated with silicone. Thanks to this compound, the damaging effect of moisture on the surface of the cut is minimized. If any fragments of the furniture unit will interfere with the installation of the sink bowl, they must be carefully trimmed. Measurements for trimming must be made accurately. it is not recommended to perform such work “by eye”. You should know that when using the manufacturer’s template, sawing out the internal elements is much easier and simpler, since its manufacture also provides for such nuances.
Installing the sink into the countertop
Marking
- To proceed to the final installation of the sink, you need to do some mandatory work. First you need to measure the pipes and assemble the siphon, then in the internal structure of the countertop you must make holes for the sewer and water supply. All these works are performed with a jigsaw or crown. After that, the faucet is installed, if space is prepared for it on the countertop. If necessary, the hoses are also cut. If the mixer will be installed on the sink itself, a place for the equipment is determined on the plumbing fixture and a hole of the required diameter is drilled.
- Before installing the sink, a sealing tape is put on the sanitary product. it usually comes with the appliance. Tape is fixed near the edge, while leaving a special groove in which the silicone will be filled. Then the fasteners are installed in their places, and when tightened they are not pulled out. they will be firmly fixed after the whole structure is finally aligned. If the mixer must be fixed to the sink, it is the turn for its installation. The hole is abundantly smeared with silicone, and then the installation of the sanitary product in the hole under the sink is carried out. Before installing the fasteners must be ducked. To ensure that the sink sits in its place and fits well into the contour of the opening, the sanitary appliance needs to be moved a little. After that, you need to get under the sink and finally tighten the fasteners. While the sealant is in a liquid state, it is wiped off. after some time, the composition will set and harden. If there are gaps left somewhere, they also need to be sealed with sealant.
Do not saw with what
angle grinder or angle grinder. that’s what you shouldn’t use to saw the countertop. Some masters advise this method to save time. However, it has more disadvantages than advantages.
Use a spirit level to make an accurate cut.
First of all, the quality of the parts is not good: because of the abrupt movement of the disc there are many splinters. Second, if large discs are used, there is a high probability of injury.

Professionals can make a better cut because they have special tools.
over, a lot of dust is left over from the work, which is unacceptable at home.