How to tension the chain on a chainsaw. How to untangle?
How to install the chain on a chainsaw
The chainsaw chain is the element that is subjected to the greatest stress and overheating. This can cause the chain to break, come off the guide bar or just become blunt from prolonged use. For timely maintenance or replacement with a new one, you need to know how to remove the saw chain from the chainsaw by yourself and put it back. The following is a step-by-step procedure for these operations.
The chainsaw chain, if you look closely, has the saw teeth pointing in one direction. The correct direction of the saw teeth on the guide bar is therefore very easy to determine:
If you position the chainsaw itself in the plane in which it is located during operation, then the row of teeth located on top of the guide bar, with its sharp edges should be directed towards the end of the bar. While, the row of teeth, which is located at the bottom of the chainsaw, should look in the opposite direction, in the direction of the drive sprocket.
You can’t put the chain with the teeth facing inward against the grooves in the guide bar, it just won’t stay on the guide bar. For this reason chain must be tensioned on the guide bar so that the chain guide lugs of the saw blade links are turned to the inside of the guide bar.
What to do when the chain is loose?
The harness should be tamed when the force of the adjusting bolt is not enough to fully tension the blade. The second common situation is when a shorter guide bar has to be replaced. No more than 2 links can be removed in total, but if you want to extend the set, additional parts can be purchased at a specialist retailer. It is important that the parts of the blade match in thickness, shape, and pitch of the cutting teeth.
Experienced craftsmen recommend the use of profiled equipment for shortening. This allows you to qualitatively carry out the work, avoiding breakage in the subsequent operation of the tool.
A rivet punch
Figure 1. Chainsaw rivet punches
This is a mechanical tool that is similar to a common baling press. Anvil, slots for fixing the saw set with different tooth pitch are included. For convenience, there are interchangeable tips for squeezing out rivets. The tool is only intended for disconnecting links.
Riveting and Turning Machine
Used in conjunction with an anvil for riveting and rolling the saw chain in various pitches. The depth of kerf can vary from 1.1 to 2 mm. Includes rotating inserts, anvils marked A or B (difference in link pitch).

Working mechanism. saw chain with a new link and fresh rivets are fastened in the guides. The area is then pressed with a roller against the built-in anvil, the motor is started. As it rotates, it presses and crushes the rivet. Slowly tighten the adjusting screw during the process. Advantage of riveting machine. in quality and strength rivets do not differ from the factory riveting, can withstand a large load.
Important! Machine tools are not practical for the home shop. They cost a lot of money and are aimed only at working with the chainsaw headset.
The negative consequences of an improperly adjusted chain
Checking the condition of the chain and tensioning it is an essential part of the preparatory work.
How to Tighten the Chain on a Chainsaw | Husqvarna
How well the chain can be fitted depends on:
- the length of its subsequent operation;
- Safety for more demanding sawing jobs;
- Engine and chainsaw life in general.
Overstretched chainsaws drastically reduce cutting performance and cause excessive loads on the power train and transmission. There is also overheating of the tire and excessive fuel consumption.
A loose chain can come off the bar or break. The formation of injury-prone moments is partially or completely eliminated by emergency stop systems and catchers that allow, with greater or lesser success, to untangle the chainsaw chain and determine its suitability for further use.
Installing a part with damaged or deformed links can lead to uneven wear of the guide bar and other undesirable consequences.
Causes of chain malfunction
Like any part, a saw chain requires attention and proper maintenance. These words primarily refer to the break-in period of the chainsaw and the saw headset. You should, however, pay attention to their condition throughout the entire service life.
The main causes of chain failure:
- Poor metal quality on budget models;
- The operator’s operating style;
- Improper tensioning;
- A defective or excessively worn drive sprocket;
- Malfunctions in the automatic lubrication system;
- A bent, clogged or otherwise broken saw bar;
- Use of poor quality materials;
- Improper sharpening of the working edges;
- The level of wear and tear on the chainsaw;
All of this can lead to rather unfortunate circumstances, and significant spending on buying new parts and repairing the chainsaw:
- Deterioration in performance and productivity;
- Safety of the operator when carrying out sawing work;
- Premature wearing of individual components and of the chainsaw as a whole;

Untangle chainsaw chain. 5 easy tips
How to attach and adjust the chain on a chain saw
Now let’s understand how to tighten the chains on chainsaws, and how this procedure is performed correctly. The adjustment procedure is not complicated at all, and the looseness of the tensioning should be checked each time before operating the tool. If this is the first time you’ve held the chainsaw in your hands, it’s important to make the first adjustment according to the manual:
- Initially, the old mechanism is dismantled, which has stretched, and is no longer subject to tensioning
- Lay the tool on its side so that the tire is on top
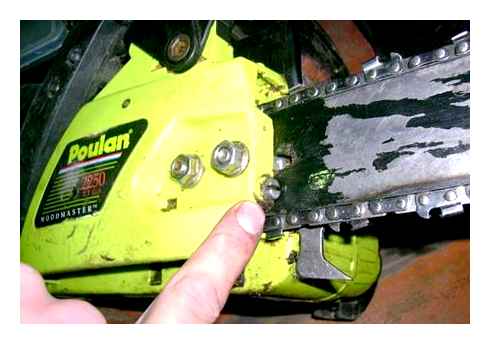
- The two nut fasteners are unscrewed, and then the protective cover is removed
- The bar is removed along with the old chain. The tire must also be replaced when the depth of the groove decreases. Usually they last at least 2-3 chain changes, but it all depends on the quality of the product
- A new chain is put on the bar, but it is important to position it correctly. The pointed teeth on top of the bar should be on the opposite side of the bar from the tool
- When the chain is mounted on the chain saw, the bar can be put in place by fixing it with the adjusting nuts

This is the end of the replacement process, and the tensioning is performed. There are two ways to do this, which are called frontal and fast. The front method is the most relevant and is done as follows:
- The nuts fixing the tire are loosened and the last part is lifted by the edge
- The chain is tensioned to the necessary value by means of the adjusting screw
- The nuts are used to clamp the tire in position
- The hands are used to check the tension
The fast way is less relevant and often used only on machines with new chains and bars. The principle of the quick adjustment is based on loosening the wing nut. In this case, the screw of the tensioning mechanism is screwed all the way in a clockwise direction. The wing nut is tightened at the end of the job, then the handle must be lowered. Watch this video to see how chainsaws are tensioned.
Causes of chain failure
A saw chain needs attention and care just like any other part. These words primarily refer to the break-in period for chainsaws and saws. But it is important to keep it in working order throughout its service life.
The main causes of chain failure:
- Poor quality of metal on low-priced models;
- Operator’s style;
- Improper tensioning;
- Failure or excessive wear of the drive sprocket;
- Faults in the automatic lubrication system;
- Bent, clogged, or otherwise broken saw bar;
- Use of substandard materials;
- Untimely sharpening of the working edges;
- The level of operating stress on the chainsaw;
All this can lead to quite sad circumstances, and significant expenses on the purchase of new spare parts and the repair of the chainsaw:
- Deterioration of operating capabilities and productivity;
- Safety of the operator during sawing operations;
- Premature wearing of individual assemblies and components and of the entire chainsaw;
Bottom line
A chainsaw consists of a motor, filter, starter motor, gearbox, clutch, guide bar, tensioning device, brake, lubricator. It runs on a classic carburetor circuit on a fuel mixture of gasoline and low. The basic parameters influencing the suitability of the chain for a particular application are the types of teeth and their characteristics, profile, shank thickness and length.
Installation and tensioning of the chain should be carried out strictly in accordance with the given algorithm and compliance with the rules. When selecting one, the following parameters are taken into consideration:

Thus even the best samples of chains for a chainsaw are not deprived of the main drawback. slack, which can be caused by faulty bars, natural deformation of metal links and weak or wrong fixation of a sprocket.
The consequences of bad repair
The consequences of a faulty repair can be very bad, the chain can injure the operator at the moment of a break. Of course, modern saws are equipped with all sorts of guards. For example, they are fitted with catchers that are designed to protect the operator in an emergency situation, and the right hand, which is on the chain line, is hidden behind the body.
But, protection does not give a 100% guarantee, so before using a repair chain with maximum load, it is necessary to try it on light works, saw a couple of branches or boards.
Also, the consequences of poor quality repair can affect the performance of the chainsaw. Let’s see what mistakes can be made during repairing process and how it affects saw’s performance.
Mistakes when repairing chains
- Pitch mismatch. The reason is that the working link is installed that does not match the basic parameters: pitch, link thickness. If you use such a set to work, you’ll end up needing to replace the drive sprocket and the saw bar, t. к. the sprocket on the bar will break.
- Another variant of misalignment in pitch is to install a working tooth in the opposite direction. It’s very rare, but it happens, especially if you’re doing it for the first time. The consequences are similar to the first item.
- The chain is longer than the guide bar. This is quite clear, the adjusting screw will not be enough to tension the chain, the chain will wobble and the wear on the drive sprocket will increase.
- Shorter. This headset cannot be installed and will need to be riveted and lengthened.
- The connecting link is slightly longer. Similar to the first point will change the pitch, leading to the destruction of the leading and driven sprocket.
In conclusion, we want to pay special attention to the quality of articles on this topic. On the pages of sites on the Internet there is information on how to repair the chain of a saw by welding. Such instructions are written by inexperienced writers who don’t know what they’re talking about.
It is possible to repair with welding, but these are not saw chains, but gear chains, designed to transfer force from one sprocket to another.
Such, can be found in the mechanisms of agricultural machines, conveyors and other units.
Why the chain on a chainsaw jams
Correcting the tensioning of the chain takes only a few minutes without experience, and with experience. less than a minute. Watching the correct tensioning is not cumbersome, but not watching is expensive.