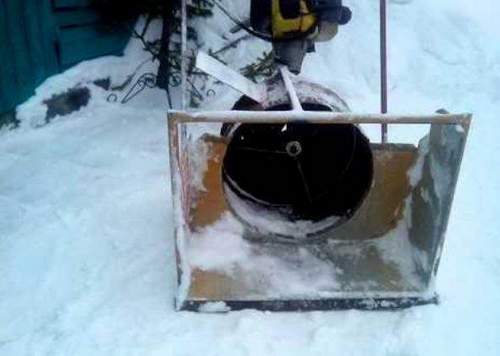
Lawn Mower Snow Blower – Preparing And Making With Your Own Hands
High for modern snowplows sometimes push frugal owners to make the machine themselves. For this purpose, you can use a home lawn mower. As a result, you get a car that in its technical characteristics will not be inferior to most household market analogues.
How to choose a suitable engine?
Before proceeding with the manufacture of the unit, you should decide on the engine for it. Depending on the type of motor, all commercially available snow blowers are divided into three types:
Lawn Mower Snowplow. Getting Started

Making a home-made machine does not require a lot of time and effort. The most important thing is to properly install the blade on the mechanism. The unit will move due to the motor drive, and the shovel mounted in front of the machine will be responsible for discarding snow.
Before you make a snow blower, you should prepare the necessary materials and improvised tools. To work, you will need:
- Metal profile, section 2 × 2 cm;
- One smooth sheet of roofing iron;
- Angle Grinder;
- Riveter and drill;
- Welding machine;
- An asterisk from an old domestic motorcycle;
- Garage tools.
Purchased metal parts should be carefully checked for rust. If you buy parts with signs of corrosion, then it will quickly spread throughout the frame, which in a short time will lead to its complete destruction. It is better to lay out all materials and equipment on a flat surface so that during work you do not look for missing small parts.
Lawn Mower Snowplow. Assembly Procedure
A homemade snow truck is going in a certain order. The correct algorithm of actions is as follows:
- First of all, you need to make a frame. To do this, cut 2 pieces of profiles, 1 meter long, and 4 pieces, 50 cm long;
- Bend two small pieces so as to form a blade from them, and then weld them to each other;
- 2 pieces of profiles of 1 m should be placed in a vertical position in the upper and lower parts of the frame;
- Weld the remaining two short pieces of pipe to the blade;
- Cut a blank of dimensions 1 × 0.5 m from a steel sheet;
- Drill a hole in the workpiece, deviating from the edge of the contour by 1 cm;
- Next, attach the finished workpiece to the surface of the frame and drill holes in the profile. In this case, the holes of both structural elements must coincide with each other. Next, rivet both elements;
- You can also use profiles to make fasteners for the unit. To do this, make 2 blanks of 30 and 2 blanks of 20 cm;
- Fasten the workpieces together in the form of corners by spot welding. Drill holes in each part, backing 3 cm from the seams;
- Next, install and fix the engine from the lawn mower on the frame and connect the drive to it;
- For ease of operation, the unit must be equipped with a handle, to which it will be necessary to withdraw the throttle control lever.
To begin testing a self-made snow blower, you should clean fresh soft snow. Only after this can you begin to work with the heavy snow that has accumulated.
Lawn Mower and Snow Blower. Two-in-One
In the absence of a desire to completely redo the lawn mower, it can be equipped with individual elements of a snowplow. To do this, proceed in the following order:
- Weld fasteners to the spade frame. The result is a finished blade;
- Install and fix the structure on the lawn mower, having previously made several holes in the unit;
- Dismantle the lawn mower knife and begin snow removal.
The manufactured unit will be quite susceptible to corrosion, since the lawn mower is simply not designed to work in the winter season. This misunderstanding can be easily corrected if the parts of the lawnmower body are treated with an anti-corrosion agent.
During operation, do not forget to change the oil in time, as the internal parts of the lawn mower are subject to heavy wear. Also pay attention to the quality of the oil used. It is best to buy seasonal lubricants with optimal density and properties.