How to saw at an angle on a circular saw
A simple and reliable guide for the handheld circular saw
Among the large number of construction tools there are all sorts of additional devices designed to facilitate the hard work of masters. Those engaged in carpentry are familiar with this somewhat strange name. “”, which denotes a tool-assist for making a cut of a board or any other profiled material
at an angle that is either structurally fixed or self-defined. For perfect design of interior and exterior projections, the angle is usually 45°.
The material intended for sawing at an angle can be different: skirting boards, door and window trims, mouldings, laths, cornices, etc.д. The workbench is rigidly fixed to the workbench, the material is sometimes clamped. such a device is safe and convenient to use.
Classification division
Despite the apparent simplicity of performance and use of the chair has its own classification:
- simple. the most popular modification is an industrial or self-made mold, usually plastic, with several side slots, which serve as guides for the saw. Designed for sawing laths, bars, angles of wood, plasterboard and other materials at angles of 45 or 90 degrees;
- rotary. with installed on a metal or plastic base hacksaw from 290 to 600 mm with the ability to turn it from 15 to 135 °;
- electric. is an electric saw mounted on a pivoting base.
Pivoting and electric power jigsaws are professional tools
, designed for sawing in two planes. Hardwood and metal (aluminum alloys) are considered the strongest and most durable products. Metal is recommended for narrow band saws, wooden for narrow work.
The essentials in a nutshell
There is no unambiguous answer to the question of how to properly level a wall of timber. This can be done by pulling them to the vertical posts on one or both sides of the wall. Or you can simply tile with cladding, gypsum board or other wall panels on a flat framework. The choice of the method depends primarily on the criticality of deformations for stability and external attractiveness of the house. If it is large, and your own experience is not enough, it is better to turn to professionals.
In any home workshop there should be at least three or four saws of different types.
- Hacksaw with a wide blade for rough cuts in large parts and blanks. The longer the blade, the faster the work. But for the same reason the mobility of the band saw blade also increases, that is why the saw, as they say, moves sideways. That’s why it is important to carefully observe the sawing line and not to let it deviate from the marking. A novelty in the recent years is the Teflon coating of the hacksaw blade, which makes sawing fresh wood easier and protects the saw from rust.
- A saw with a “back” differs from an ordinary hacksaw not only in that it has a rigid attachment that “dampens” the vibration of the blade, but also in that it has smaller, closer-standing teeth. This saw makes it possible to make a clean and thin cut.
- Finishing saw for a clean cut.
- A saw with a narrow blade is for cutting rounded pieces and large holes. A basic rule of any saw care: its blade must always be dry and clean. Regularly sharpen the teeth of the saw. even when hardened.
Choosing the right tool
Choosing the right tool for the job, experienced sawmakers can give you the advice you need.
For sawing at home, a household or semi-professional D-shaped jigsaw, which is operated with one hand, is enough. The more power, the heavier the jigsaw and the harder it is to cut cleanly.
A step speed regulator, electronic stabilizer and reciprocating saw blade makes the sawing process much easier. The presence of a plastic overlay on the sole will allow you to securely fasten the machine to the cutting blade. Built-in air blowing and backlighting are useful features.
It is worth paying attention to the attachment of the blade. Some models have a limitation that does not allow you to use any saw.
It is not recommended to saw boards with a jigsaw. Although a powerful tool can do the job, a perfectly even cut is unlikely to succeed.
Each model of jigsaw differs in shape, so it is worth holding the tool in your hand before buying, and if possible, test it directly in the store.
How to cut wood with a circular saw: 10 tips
These ten simple and useful tips will save you nerves and of course money. You made your choice and bought a cool circular saw. it’s time to try it in business!
Let’s make something useful for the house from laminated plywood. Maybe a shelf for books, or maybe a universal bench like this. It does not matter what, as long as you know how to do it. You have to start somewhere? And we will start with the fact that you brought a large sheet of plywood, and you need to saw it with a circular saw into smaller pieces.
Important! Remember to wear personal safety equipment. at least goggles. when working with a circular saw. Sawdust flies in all directions and at quite high speed!
How to saw correctly?
Fiberboard should be sawed on a horizontal surface, e.g. a table or a special saw bench. The surface must be stable, otherwise the accuracy or evenness of the cut when working with a vibrating electric tool and a hand saw will be difficult to achieve. The plate must be in tight contact with the surface of the table.
When cutting material with the jigsaw, the workpiece to be cut from the sheet should be to the right of the tool. In the case of a hand saw, this factor is not mandatory. the placement of the sheet depends on the convenience of the master when working with it.
While working with the jigsaw, it is necessary to press a sheet of fiberboard slightly against the table surface in the place of the cut, which contributes to a clean. without “fringes” on the edges. sawing. When cutting with a fine-toothed hacksaw it is necessary to hold it at a slight acute angle to the mowing line of the cut in order to get an even edge.
If you do the work with a circular saw, you should use angle grinder blades designed for wood. If you saw with the standard wheel that circular wood saws are equipped with, you will not be able to avoid chipping on the edges of the cut.
For cutting small pieces of laminated fiberboard of small thicknesses a knife with a sharpened blade and tip may be the best tool. Here too, it is important that the fiberboard sheet is firmly seated on the surface. In this case it is possible to cut even on the floor, as there is no need to overhang the edge of the workpiece over the edge of the table surface. However, you should put something under the trimmer line if you don’t want to damage the facing of the surface on which you are working. Then with the help of a metal ruler along the mowing line markings on the sheet of fiberboard are made several times with a sharp knife tip, until the entire workpiece is cut off. It should be noted that the knife can cut quite accurate in size blanks with straight edges.
In any case, when the edges of the workpiece are not too straight and clean, they can be smoothed and cleaned up with a planer, fine sandpaper or a file.
If the solid sheet must be cut in half, it is better to find an assistant to hold while sawing its part hanging from the table top of the sawing table. And you can also use two tables, placing the cut plate in the gap between them.
The following video shows how to make a straight cut with the jigsaw.
Adjusting the riving knife
It is very important that the riving knife runs straight in line with the blade. Adjustment is performed by placing U-washers under the mount on the side where the knife is offset. If the equipment does not include U-washers, you can make them yourself from sheet steel.
If it is necessary to remove the riving knife, it is advisable to remember which washers are on different sides of its fixation. This avoids having to readjust the machine unnecessarily.
Reliable fixing of machine settings
Once the circular saw adjustment is completely finished: leveling blade is correctly adjusted, guide rails and table top parallelism are set, fixing bolts must be tightened firmly. The machine lets out a lot of vibration when it is running, so the looseness loosens and the settings get confused. It can cause damage to the workpiece.
All of these adjusting procedures can be done in a few minutes. It is advisable from time to time to diagnose the set-up equipment settings to ensure that the wood workpieces are always of high quality.
How to make a hand saw guide and saw boards evenly like a stationary circular saw
A straight cut with a handheld circular saw is not so easy. Because of the heterogeneity of the wood and for other reasons, the saw always tends to go sideways. Of course, you can buy a guide bar in a store, but the factory branded product is comparable in price to the saw itself. With basic carpentry and locksmithing skills, this useful addition to the tool can be made by yourself.
- Manual circular saw;
- laminate;
- aluminum channel beam;
- screws, bolts, nuts and washers;
- aluminum plate;
- double-sided adhesive tape;
- Roll of sandpaper.
The process of making a guide bar for a handheld circular saw
Using a stationary circular saw, make longitudinal and transverse cuts in the laminate to obtain the base blanks of the guide rail.
Join the two laminate boards lengthwise by tapping the joint with a mallet, and fill the back side with quick-drying glue.
Sand the surfaces of the workpieces with an emery cloth on a circular mandrel and wipe them with a cloth.
Apply glue to the back surface of the narrow laminate workpiece, press the aluminum channel to the base along its length as a stopper, and glue the narrow workpiece to the base along the aluminum channel.
Drill holes of the same type in the back of the aluminum channel at regular intervals, boring them on the inside for the screw heads, and removing the burrs on the outside with emery cloth.
Lay the aluminum channel along the narrow strip glued to the base with a guaranteed clearance, using two pieces of aluminum channel of the appropriate size.
Apply glue to the contact area between the aluminum channel and the laminate base and press the channel so that the stops will slide freely along the guide rail.
Attach the guide rail with screws through the holes in the back of the channel to the base.
Grind down the ends of the screws on the back side of the base with a hand grinder.
Fasten the narrow bar with screws along its length, screwing them into the laminate base. Grind down the ends of screws with a hand grinder on the reverse side as well.
Cut to size an aluminum channel similar to the guide rail. Based on its dimensions, make two parts from the aluminum strip, bending closer to one end twice at right angles. Straighten bend points with a hand file.
Mark out the large sides of the curved plates and cut along the edges along the entire length of the strip. Deburr and round off the edges.
Make two holes at the base of the plates.
Rounding the corners of a piece of aluminum channel. Glue the aluminum curved strips to the aluminum channel, following the attachment points on the hand-held circular saw.
Drill holes in the aluminum channel to match the holes in the curved strips. Bolt them together with nuts and washers, placing the bolt heads inside the channel.
Leading the long ends of curved strips into the fastening nodes on the circular saw and tightening the wing-nuts. The channel must fit tightly on the side of the circular saw’s working base.
Insert the end of the channel on the circular saw into the groove of the guide rail and cut off a strip from the base to match the width of the saw’s working base. Correct the other sides of our fixture as well.
Grind once more with an emery cloth, remove material particles with a brush, wipe the base of the device with a damp napkin.
Glue lengths of double-sided adhesive tape to the clean surface of the base. Measure a roll of coarse-grained sandpaper along the width of the base and tear off the excess across the width.
Remove the protective film from the tape and glue a strip of sandpaper with grit to the outside. Cut the ends to fit the length of the base.
We rub the contact surface of the guide rail and the base of the laminate with paraffin candle and our device is completely ready for work.
How to make a fixture for a circular saw for a quick cut at 45 and 90 degrees
The circular saw’s performance is considerably reduced when cutting at 90 or 45 degrees because of the long adjustments, including marking. If you have a homemade, not very complicated device, these operations will be much faster and easier.
- laminated lumber;
- plywood 400×500 mm;
- 1.5×10×25 mm aluminum angle;
- aluminum strip 3×25 mm;
- glue for wood and metal;
- different screws;
- grease for sliding surfaces;
- threaded bushings for wood;
- wing bolts, washers and nuts;
- adhesive tape.
How to make a circular saw harness
We use glued beam with width of 25 and 45 mm. We’ll make the base of the device out of multilayer plywood 400×500 mm. Other combinations of dimensions are also possible.
Shape the glued beam blocks of the same height for all elements.
According to the marks, set the 400 mm long logs on the glue across the base, closer to one edge.
On the edge of the far side of the base from 400mm timber, place two 45×55mm timbers closer to one of the sides of the base 500mm with the gap between them, orienting the long sides transverse to 400mm timber.
On the other side of the 400 mm plywood, mount a 123×25 mm plywood symmetrically to two 45×55 mm pieces along the edge of the 400 mm side of the base.
After the glue has hardened, turn the base plate by 180 degrees and fasten all the dblocks on the board’s front side with screws according to the marks.
Glue a 3×25 mm aluminum strip to the base of the aluminum angle 1.5×10×25 mm with metal adhesive and use clamps to squeeze it.
Lay the aluminum angles with strips longitudinally to the sides of the base 500 mm on the joist supports so that their ends rest on the outer corners of the joist 123 × 25 mm and did not go beyond its dimensions.
According to the markings, we drill holes in the aluminum extrusions above all joist supports from the front side.
To fix the rails, we apply adhesive tape to the supports, squeeze them with screws and fasten one of them with screws first.
Let’s try on the circular saw base, put the second rail and fasten it with screws.
For easy sliding of the circular saw base on the guides, apply lubricant for metal surfaces.
Having checked uprightness of a circular saw blade, we make through-cut in a basis, cutting and a bar of 400 mm, and also we cut into a support from a bar on edge of a basis, but we do not cut completely a section of a basis from a bar 400 mm to a bar 123×25 mm.
In the bar with a hole screwed flush threaded bushing for wood M6×13 mm. Assemble it and the other two elements into a U-shaped unit, the bar with a sleeve being one of the legs of the unit.
Screw the nut on the wing bolt as far as it will go and screw it into the sleeve. We establish the U-shaped knot with legs on a bar of 400 mm with possibility of moving and fixing in a necessary place determined by measuring tapes, glued on the inner side of a bar of 400 mm.
Lead the line for trimmer under 45 degrees to the kerf in the base, providing the processing of workpieces of a certain width.
Using the holes in the stop as a template, we drill into the base and screw the threaded bushings into them. We fix to them by means of washers and wing bolts a stop-limiter for cutting of blanks at an angle of 45 degrees.
To the end face of the 500 mm side of the base, screw wooden battens that, when installed vertically, extend beyond the bottom of the base.
To prevent lateral displacement of the guide rails, we glue wooden stops on the outside of the guide rails.
We set the device on a flat place and with the help of wooden slats on the end of the base fix it.
Now without marking and easily perform cuts at 45 and 90 degrees, or productively prepare a lot of billets to one size.
How to make a trimmer from a hand circular saw at home
Hello dear readers and subscribers of the blog of Andrew Noack. In this article I will tell you how to make a manual circular saw for your home ends, while spending a minimum of money on production. Trimming block from a manual circular saw. a good assistant in your household, with the help of which you can do “very big things”!
To focus on the term “circular saw” I think it is inappropriate, as everyone has firsthand knowledge of what this device is, and there are enough thematic materials in my blog. I will try to tell you what is a crosscut saw (facing saw) and deliver as much useful information as possible to visualize.
A pendulum-type mitre saw is of the following design. The base of every machine is the base frame. It also carries the table, which is mounted on a pivoting mechanism with a ruler. This device enables the sawing angle to be set and adjusted.
Cutting angle can be adjusted by moving the table relative to the bed plane. The sawing element is supported by a lever and spring-loaded by a pivot. The saw blade can be moved vertically by means of a pendulum.
For the combination variant, the cutting angle can be adjusted in both directions, if required. The design is the same as that of the pendulum saw, with the addition of an additional pivot. As for changing the cutting angle in the horizontal plane, it can be changed in the horizontal direction, which in turn is opposite to the mounted drive.
The broach saw makes it possible to move the cutting element both around the axis of the hinge mechanism and in the forward direction along the kerf. This is achieved by installing guides (see photo below).
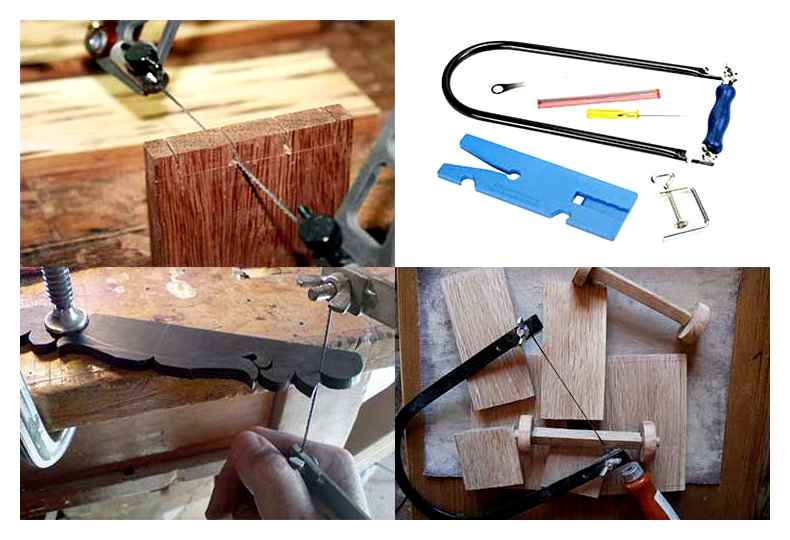
For ease of use on the mitre saw, operators use a special device for mitre sawing on the circular saw, which is called a plier. An uncomplicated design, consisting of a tray for boards, a pressing plate of plywood or other material, clamping elements (clamps, etc.) and a screwdriver.). How does this device work?? I will try to answer this banal question simply and understandably.
The board is placed in the tray and pressed by a sheet of chipboard. It is fixed with a clamp and a hand saw, circular saw, angle grinder is cutting workpieces through special side cuts. Often the jigsaw is used for cutting material at an angle of 45-90 degrees in home workshops on circular saws. With this device you can quickly cut a board into pallets or boards.
After all the information, you have an idea of what a trimmer is and what it is needed for. Next, I will tell you how to make with improvised materials with my own hands edger from a hand circular saw.
The base of the structure is a box made of particleboard. It has a “U” shaped. It is hammered and fastened with screws. To prevent displacement of this shelf, clamps to the work table (workbench).
The saw base is screwed onto the shelf from above. The fastening is carried out with screws. Observe the perpendicularity of the planes, as the saw blade will be level at the edge.
We even out the edge of the sawing board. This will prevent displacement and wiggling. Screw the chipboard strips on the sides with self-tapping screws. In this way, the positioning of the sole plate is achieved.
The saw is fixed with clamps and clamping clamps. It is possible to make thumbscrews. Here is such a device for trimming on the circular saw in this variant turned out. Such a device is popularly called “the foreman”.
Next to the base to the table we fix the base “table”. The only disadvantage is the reduction of the cutting depth by 15 mm. That’s why you have to put the profile as close as possible to the saw’s base.
After making a test cut, we get a line for a trimmer cut on the basis of the stop. Thus, it was possible to construct with their own hands a crosscutting machine from a circular saw. Such a device design copes with the task at all hundred percent. If you still do not manage to construct this type of equipment or simply have no time to do it, you can take advantage of rental services circular cutters at affordable prices, in specialized workshops.
Another good tool for working with wood is the crosscut saw. What it is? You can divide it into two kinds. manual and in the form of a full-fledged circular saw. As a rule, the handmade version is only needed to transfer data from the drawing to the actual material and workpieces.
Circular Saw Board Edging Device
How to make circular saws with your own hands?
There are quite a few devices that can be made by hand for a circular saw.
Circular saw table diagram with lifting and lowering mechanism.
How to Make Homemade Circular Saw Devices?
Materials and tools that will be needed:
- Tectolite or plywood.
- Countersunk head screws.
- Mandrels.
- Clamps.
- Double-sided adhesive tape.
- Organic.
- Silicone Spray.
- Aluminum angles.
- Paraffin.
- Fiberboard.
How to make a guidebook
To make a guide, you can use a plywood sheet, which has straight face surfaces. To do this, cut a strip from the sheet with a width equal to the maximum possible width of the circular saw. Add 20 cm to this value. The length of this sheet should be slightly longer than the maximum length of the material.
First of all, you need to step back 6-7 cm from the factory edge on the prepared piece of plywood and cut the strip. This strip will be the ruler along which the saw frame of this type will move. The part of the cut sheet of plywood that remains will serve as the base on which the ruler will be attached. Along the ruler the saw moves as it cuts.
It is important to make sure that the height of the ruler is equal to the thickness of the saw frame.
Then you need to set the ruler on the base. It is fixed at a distance of 10 cm from the edge. The distance can be less, but it should be enough to use clamps.
The factory face must be sent to the side where the cut will be made. Guide is glued to the base and additionally secured with screws.
At the end of the day, you need to remove the extra part of the base. You can do this with a circular saw. The manufactured surface on the base will be as flat as the face of the plywood on the ruler.
This guide is very easy to work with. The base with the ruler is secured to the workpiece, such as particleboard. You can fix this by using several options. In the first method, part of the cut sheet will be located on the side of the saw blade in the second method under the base on which the guide ruler is fixed.
The length of the sheet is 2 marks on the side, which corresponds to the specified cutting methods, at the distance where the cut is located. The distance between the marks should be maximum. It is important to consider the thickness of the disc. The base of the ruler is fixed on two marks and secured with clamps. The depth of the clamping jaws must allow them to be mounted so that the saw can move freely out of the leaf at the end of the cut.
If the guide bar is a long length, then a crosscut is not very convenient. Therefore, it is advisable to make a design that is shorter. For example, for 60 cm wide cabinets, you will need to make a 1 m long guide.
These devices are only suitable for working with materials that have a large width and length. You can not cut the board on the flat bars of this design.
Designs for a circular saw that will help you make a precise cut
If a circular saw blade of this type will leave broken fibers and chips on the edges of the saw, then you can try to make a design to get zero clearance. You need to cut a piece of 6 mm thick hard fiberboard. Then you have to remove the disk, lift the protective cover, and glue the piece to the base. This can be done using double-sided duct tape. Then the saw is turned on, and the disc slowly plunges into the hard board, so that you can get a cut with zero clearance.
The process of making the end chopping board
Today I would like to share with you how I make cutting boards. The process is not quick, but it is very interesting. You begin with the selection of the material for the board. There are many variations, but the material must be dry. Naturally, the cutting board should be strong and durable, so I choose hard wood: oak, ash, beech (you can also use exotic species, but the cost of such material is much higher).
After selecting the appropriate material, you can begin machining it. First, boards need to otfugovat (otstrotat) on the machine (if there is no such, you can do with a regular electric planer, but it will take time many times more), that is to give them a base. the two planes that form a right angle.
Then I run the workpieces through a thicknesser and get a calibrated and even workpiece. Need this for further sawing with a circular saw. We saw blanks into planks (planks, slats, call them whatever you want) of equal thickness and length.
Then it is necessary to glue it all into a board. After sawing the boards have two planes, which are planed and then glued to each other. For quality gluing needs to create good pressure, for this I use the pipe clamps (if they are not available, will do and ordinary, but they are not very convenient to use). Glue use PVA for wood, I have this.
The indicator of good gluing is the even extrusion of glue along the length of the seam.
At this stage, you need to pause and let the board dry.
When the board is dry, you can continue to make the end chopping board. After gluing the board is calibrated by the panel saw, it becomes even and smooth, so it is suitable for further manipulations.
Now you have to saw it. It can be done with a hand circular saw, on a band saw, you can even use a jigsaw. I do it with a stationary circular saw. Here you set the thickness of our future cutting board. I put the thickness of 35 or 40 mm (always need to leave a margin of 2-3 mm for further processing), all depending on the size of the product.
After sawing it is necessary to glue the workpieces again, of course, gluing them end-side up. We lay the workpieces on their side and apply glue to one side of each slab (don’t forget to glue the “sacrificial bar” to one side of the workpiece. this will avoid chipping when planing in the wood planer). It is convenient to apply glue with a roller for smoothing wallpaper, so the glue is easy to distribute evenly. At this point, you will again need clamps. The glue came out evenly, so the gluing will be successful. And again you need to leave the workpiece to dry overnight.
When the glue has dried, you’ll need the planer again. We calibrate the board to the desired thickness, we get an even workpiece, ready for further processing.
Next comes sanding, for this I use an orbital sander. Sanding is not a quick thing, so you must have patience. First I go through with sandpaper with a coarse grit, gradually passing to the fine. You can feel the result. the board will be very smooth and have a slight glossiness. The board’s corners can be rounded, or left as is. There you go, it’s up to you.
The cutting board is almost done, but you still have one last thing to do. The board should be treated with mineral oil and waxed to make it resistant to moisture. The oil can be bought at any drugstore (Vaseline oil), you can also use linseed oil. The main thing is not to use other edible oils, if you do, the board will eventually smell of rancid oil.
As the first layer we simply apply the mineral oil, rub it in using circular movements and let it soak for six hours. The second layer we apply the oil with the addition of natural beeswax, the mixture should be applied warmed up. Use a 4:1 ratio (4 parts oil and 1 part wax). Let the board rest for another 6 hours and remove the remaining wax from the surface.
The last step is screwing the legs. Feet are needed to keep the board ventilated on the underside.
That’s it! The end cutting board is fully prepared to last a long time and bring you the joy of cooking.
Making this product requires a certain amount of skill and patience. Try! You are bound to succeed. Good luck!